How to Install TYPO3 Templates: A Beginner's Guide
If you are new to TYPO3 and do not yet know how to install templates, this guide can help you learn everything you need to know.
Steps to Install TYPO3 Templates
To install the TYPO3 template, make sure it is compatible with the system and that you have the files necessary for the process. These are the same checks a TYPO3 agency would perform before starting the installation. Follow the steps below to begin the process.
Step 1: Log in to TYPO3 Backend
Start with logging in to your TYPO3 Backend where you will install and activate the template.
Enter your ID and Password and click on Log in to continue.
Step 2: Install License Management
Next, we will install the licensing management that will help you activate your TYPO3 Template license using the keys.
- Click on Admin Tools on the left menu options
- Go to Extensions
- On the top, bring down the drop-down menu and select Get Extensions.
- In the search option, type ns_license and hit Enter.
- Install the License Management extension.
Once done, we will move on to activating the license.

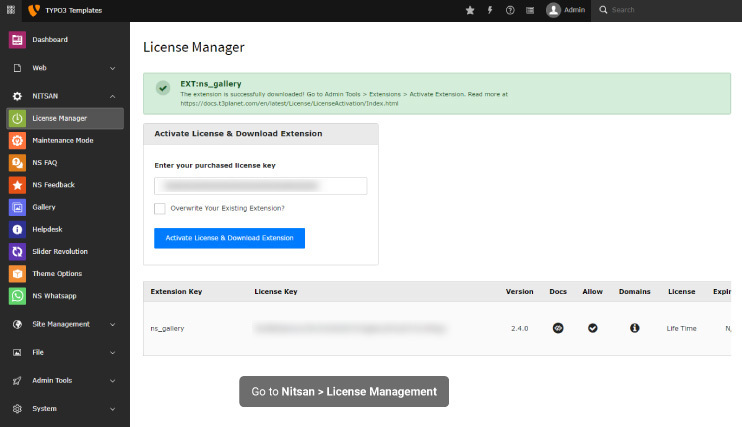
Step 3: Activate License
We will use the License Management extension to activate the license. Before doing so, make sure you have purchased the License key. If not, you can get the license after purchasing the TYPO3 Products from our TYPO3 Marketplace.

TYPO3 is one of the most popular CMS platforms that powers hundreds and thousands of websites on the internet. Since its release in 1998, it has supported over 50+ languages to manage multilingual content. The major reason users prefer installing this open-source content management system is because of its high flexibility and multiple options available to customize, such as creating extensions and installing templates.
If you are new to this and are still stuck on installing templates, this guide might help you with everything you need to know. TYPO3 Templates have a flexible backend management system that allows you to edit or even customize them as needed. They are highly compatible with other extensions and lightweight.
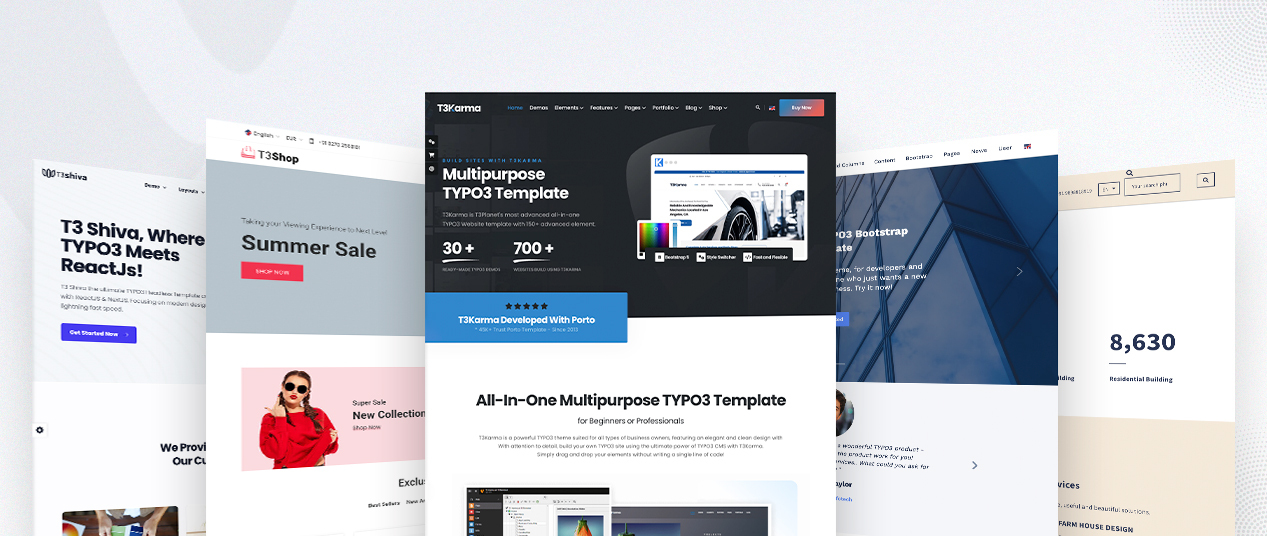
You can find the free TYPO3 Templates from T3Planet. It has both Free and Pro, listing a few Free Templates here:
Let us look at all the steps you need to follow to install the TYPO3 template.
Moving on, follow the steps below to activate your license.
- Click on License Management on the left menu options
- Now, open the email and copy the license key you received after purchasing the product.
- Paste it below “Enter your purchased License Key.”
- Click on “Activate & Download”
Your license is successfully activated, and you can now activate your template as well and customize it further.
Step 4: Activate the Template
Once you have followed all the steps mentioned above, you can now activate the template. The steps are easy to follow.
- Go to Admin Tools and open Extensions.
- Under the Extension list, look for the template and click on Activate icon beside it.
Once you click on it, you can now see the list of files that have been installed and activated with the template.

Step 5: Access the Template
Lastly, once the template is installed and activated, you can access it from the Web section of your TYPO3 backend.
- Click on Web on the top-left menu options.
- Go to Page.
- Choose the Root of the Page tree.
- Here, click on the View Webpage button at the top.
You can now see that your template is active on the website. You can then go back to your CMS or the TYPO3 AI Website Builder and customize it as needed.

Conclusion
Were you able to activate the template? We have mentioned all the steps that will help you install and activate your template on the site. Before this, make sure you have purchased the license key from TYPO3 Marketplace, or else you will not be able to get the Template license.
You can follow the same steps for all the templates or extensions you want to add to your site. If you are stuck at any point, Let NITSAN - your TYPO3 Agency help you with your next project.

Mihaela Angelova
Project ManagerMihaela keeps technology projects on track and ensures to meet business goals. She specializes in coordinating teams, optimizing workflows, and delivering projects. At NITSAN, she works closely with clients to transform ideas into actionable solutions. Outside of work, she enjoys exploring new hiking trails.
: