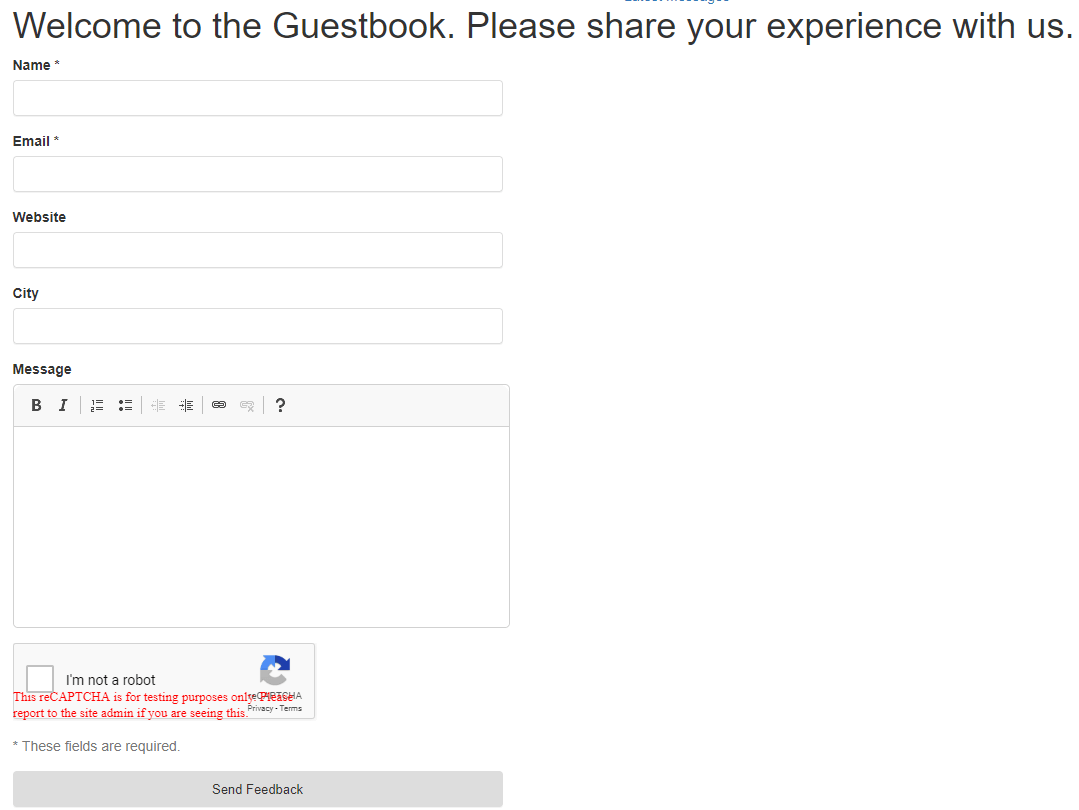
Guest user adds their details and can see all guest user’s guest book detail. Admin can see stories which are submitted by users in Guest book tab. Admin can edit, delete and published/unpublished guest entry. The feature of guest entry auto publish is configurable from the backend.
Key features of ns_guestbook extension
- Easy to install and easy to configure.
- Spam protection with captcha.
- Admin easy to manage the guest entry from the back-end.
- Responsive Design
- Ajax submit form
- Email notification
- Meta Fields
- Preview for the frontend form
- Preview for the admin editor form
1. Front-end view of NS Guestbook
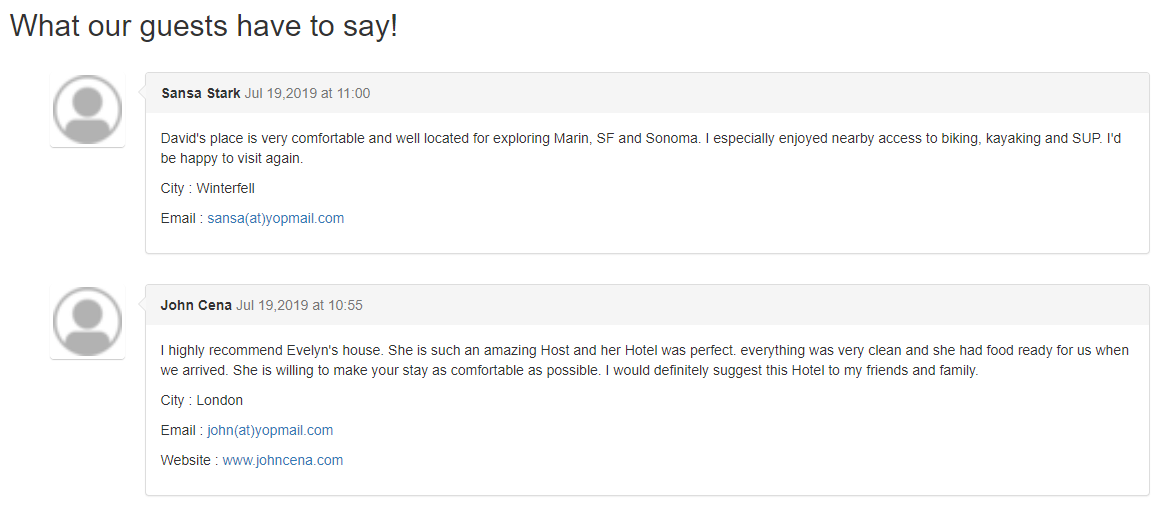
Comments listing
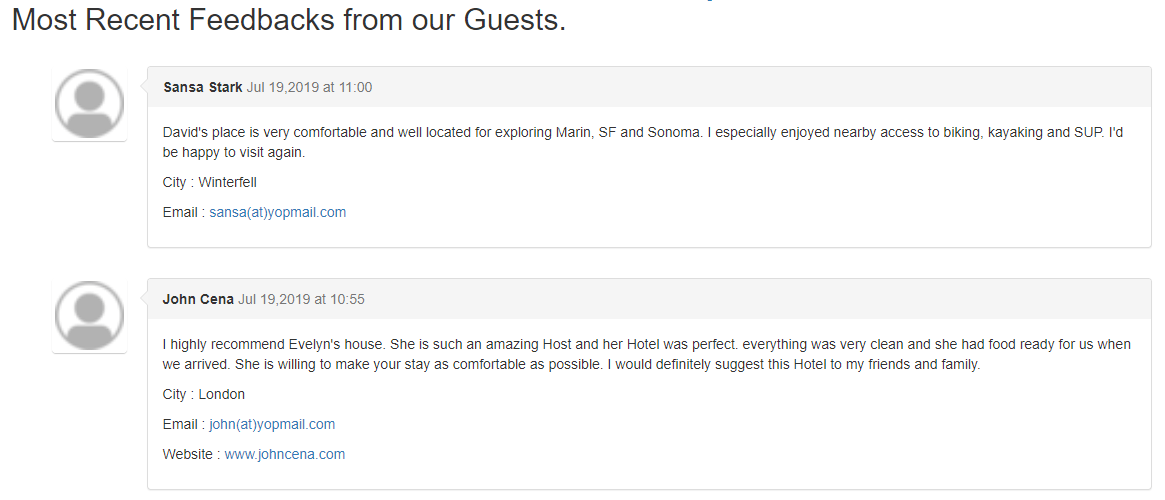
Comments sorting with latest comments first
2. Overview of extension
| Extension Key: | ns_guestbook |
| Extension URL: | https://extensions.typo3.org/extension/ns_guestbook/ |
| Support: | github.com/nitsan-technologies/ns_guestbook/issues |
3. Back-end view after plug-in installation
3.1 Get the extension via composer
Using the command line

composer req nitsan/ns-guestbook3.2 Get the extension
Step 1: Switch to the module “Extension Manager”.
Step 2: Get the extension
Get it from the Extension Manager: Press the “Retrieve/Update” button and search for the extension key 'ns_guestbook' and import the extension from the repository.
Get it from typo3.org: You can always get the current version from extensions.typo3.org/extension/ns_guestbook/ by downloading either the t3x or zip version. Upload the file afterward in the Extension Manager.
3.3 Activate the TypoScript
The extension ships some static TypoScript code which needs to be included.
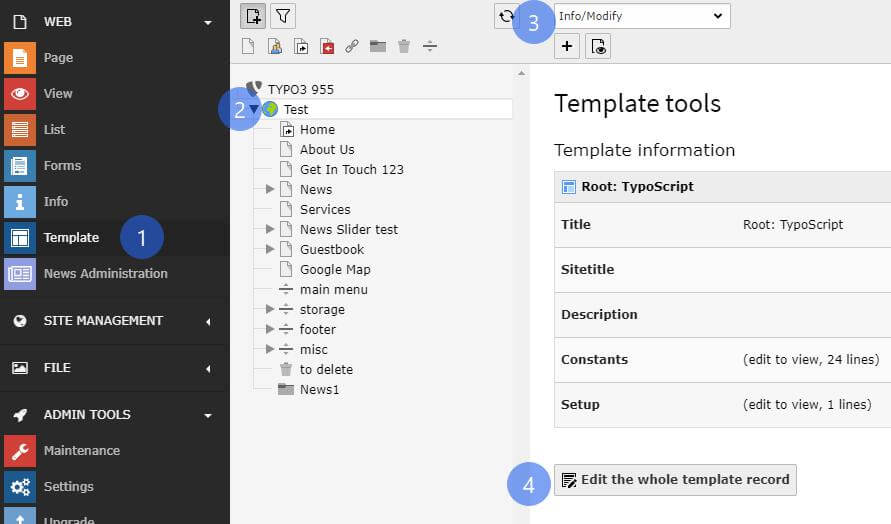
Step 1: Go to Template Module
Step 2: Switch to the Root page
Step 3: Select Info/Modify option from the drop-down
Step 4: Click on Edit the whole template record button
Step 5: Switch to Includes tab and add [NITSAN] Guestbook(ns_guestbook)extension to Selected Items list in Include static (from extensions): section
![[NITSAN] Guestbook(ns_guestbook) [NITSAN] Guestbook(ns_guestbook)](/fileadmin/ns_theme_ns2019/blog/live/TYPO3_Website_Guestbook_Utility/TYPO3_Website_Guestbook_Utility_7.jpg)
3.4 Configuration
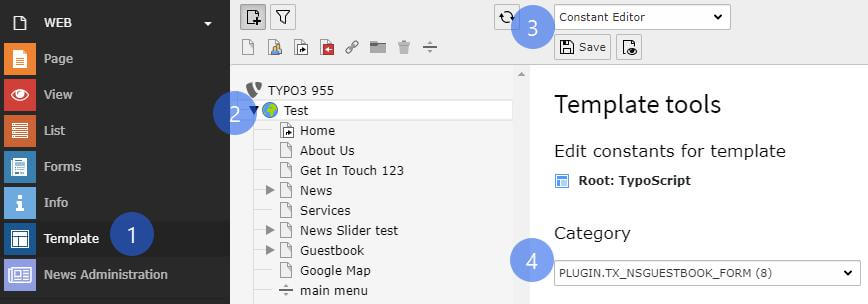
Step 1: Go to Template.
Step 2: Select root page.
Step 3: Select Constant Editor > Plugin.Tx_NsGuestbook_NsGuestbook.
Step 4: Now, you can configure all the options which you want eg., cache configuration, storage folder, views of comments etc., See below screenshot.
3.5 Add Guestbook plugins in backend
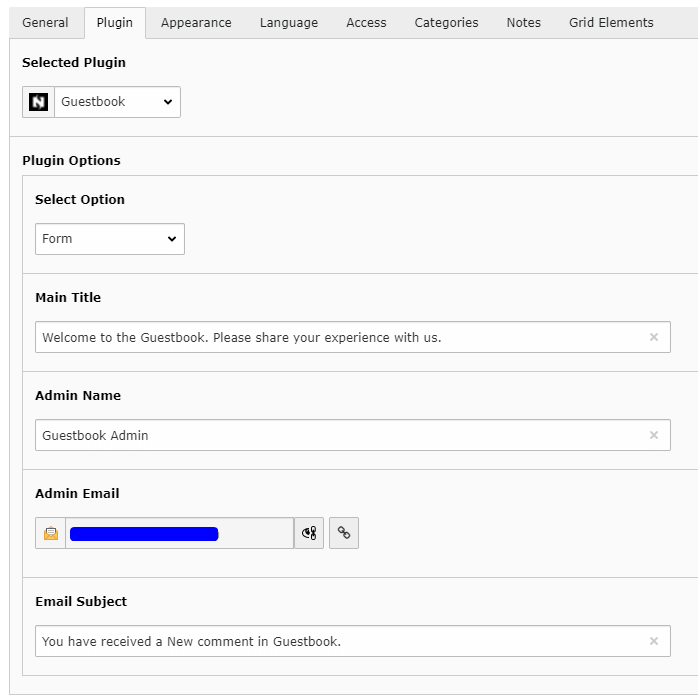
Step 1: Switch to page where you want to add Guestbook Form.
Step 2: Add Guestbook Plugin and select Form as Option.
Step 3: Set Title for Guestbook Form and E-Mail related details. See Below.
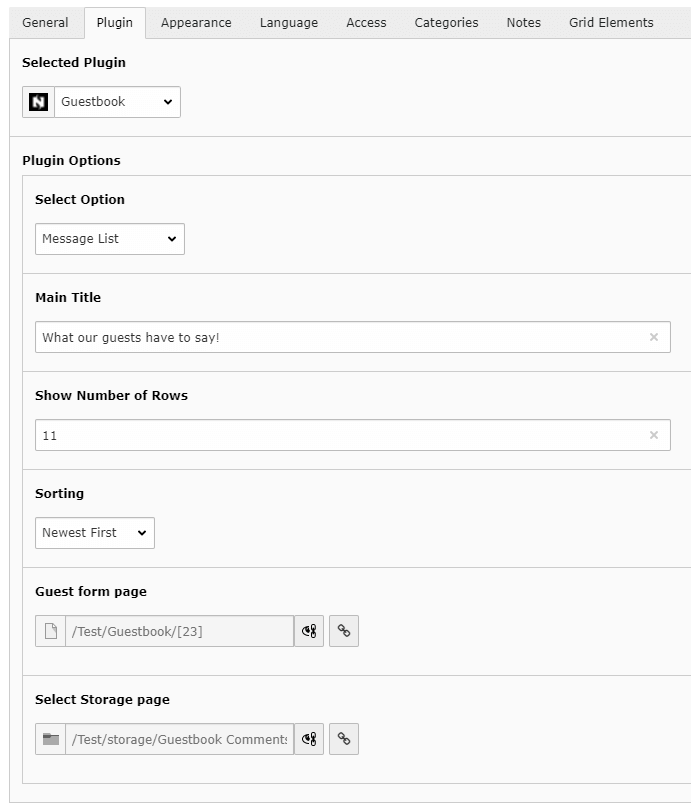
Step 4: Switch to page where you want to display a list of Messages from guests.
Step 5: Add Guestbook Plugin and select Message List as Option.
Step 6: You can set heading for the list, No. of messages to display, sorting of messages in this plugin.
4. Cache clearing
In case you encounter any issues or not working, then please use the buttons ‘Flush frontend caches’ and ‘Flush general caches’ from the top panel. The ‘Clear cache’ function of the install tool will also work perfectly.
5. Support
- Support: You could report any issues/problems at Github - https://github.com/nitsan-technologies/ns_guestbook/issues
- Website: https://nitsantech.de/
Feedback & Suggestions
Just download & try our ns_guestbook extension. You can write down your feedback/suggestion/comments to below comment box and help us to do better! If you’re looking for expert help with setup or customization, our TYPO3 Agency can assist you in getting the most out of it.


Be the First to Comment